 0
 0
Labels on refrigerated milk bottles face a different set of challenges from those on products stored at room temperature. After labeling, milk bottles may enter cold storage, pass through refrigerated distribution facilities, or be placed in retail display refrigerators. During these stages, moisture can form on the bottle surface, temperatures can fluctuate, and labels may gradually lift at the edges or lose adhesion.
For dairy producers, these problems affect more than packaging appearance. Loose or damaged labels can make product information difficult to read, weaken shelf presentation, and increase packaging waste. Even when a label looks secure immediately after application, it may begin to peel after several hours in a refrigerator.
Ensuring reliable label adhesion requires more than choosing a strong adhesive. Bottle material, surface cleanliness, condensation, label construction, application pressure, and machine settings all influence the final result. By understanding how these factors interact, manufacturers can improve packaging consistency and reduce labeling defects throughout the cold chain.
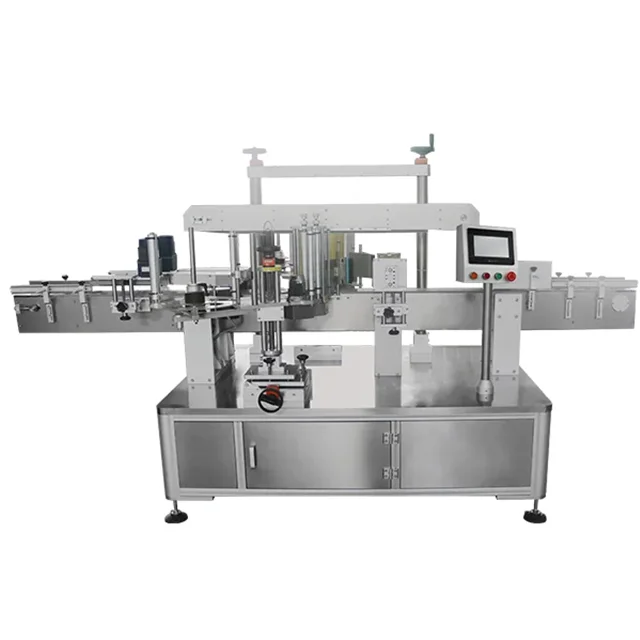
Why Do Labels Peel Off Refrigerated Milk Bottles?
The main challenge is that the conditions during labeling may differ significantly from those during storage. A bottle can be dry and warm when the label is applied but become cold and wet shortly afterward. If the adhesive cannot tolerate these changing conditions, the bond between the label and the bottle may weaken.
Several factors commonly contribute to label failure.
First, condensation creates a moisture barrier between the adhesive and the bottle surface. Second, low temperatures can slow the development of adhesive bonding, depending on the adhesive formulation. Third, the plastic or glass surface may have characteristics that make adhesion more difficult. Finally, incorrect labeling machine settings can leave parts of the label insufficiently pressed against the bottle.
These problems often occur together. For example, a label applied to a slightly damp PET bottle at high speed may initially appear acceptable. Once the bottle enters cold storage, moisture can accumulate near the label edges, allowing them to lift gradually.
A reliable solution therefore involves the entire packaging process, from bottle preparation and label selection to the operation of automatic milk bottle labeling machines.
1. Choose an Adhesive Designed for Refrigerated Conditions
Adhesive selection is one of the most important decisions when labeling milk bottles. An adhesive that performs well on dry bottles at room temperature may not provide the same results in refrigerated environments.
Some adhesives lose their ability to form an effective bond when applied at low temperatures. Others can maintain adhesion during cold storage but struggle when exposed to moisture or repeated temperature changes.
Before selecting a label, manufacturers should consider three operating conditions:
-
Application temperature: The temperature of the bottle and the surrounding environment when the label is applied.
-
Storage temperature: The temperature the labeled bottle will experience during refrigeration and distribution.
-
Moisture exposure: Whether condensation, splashes, or persistent surface moisture are likely to occur.
These conditions are related but not interchangeable. A label suitable for cold storage is not necessarily designed to adhere reliably to a wet bottle during application.
For dairy packaging, pressure-sensitive adhesives formulated for refrigerated or moisture-exposed applications may be appropriate. However, the specific adhesive must be matched to the bottle material and actual production conditions.
When evaluating a milk bottle labeling machine for refrigerated products, manufacturers should test the complete label construction rather than assessing the adhesive in isolation. The adhesive, face material, release liner, bottle surface, and application method all influence performance.
2. Prevent Condensation Before Label Application
Condensation is a common cause of poor label adhesion on refrigerated milk bottles. When a cold bottle comes into contact with warmer, humid air, moisture can form on its surface. If labeling takes place before this moisture is removed, the adhesive may not establish sufficient contact with the bottle.
Even a thin layer of water can interfere with bonding. The label may appear to stick initially, but the edges can begin lifting during storage or handling.
The most effective approach is to control moisture before the bottle reaches the labeling station.
Where the production process permits, bottles should be labeled under conditions that allow the surface to remain dry. If bottles are filled with chilled milk before labeling, the line may require a suitable drying stage or environmental controls to reduce condensation. The exact solution depends on bottle temperature, ambient humidity, line speed, and the layout of the filling and packaging line.
Manufacturers should also avoid assuming that a bottle is dry simply because no visible droplets are present. A thin moisture film can still affect adhesion.
A practical test is to inspect bottles immediately before labeling and compare adhesion results under different humidity and temperature conditions. If labels perform well on dry bottles but fail on bottles with surface moisture, the process may need better moisture control or an adhesive specifically designed for damp application.
For dairy producers, integrating appropriate bottle preparation with an automatic milk bottle labeling machine can improve consistency and reduce the likelihood of labels peeling after refrigeration.
3. Match the Label Material to the Bottle Surface
The label material must work with the physical properties of the bottle. Milk packaging commonly uses PET, HDPE, and glass, and each surface presents different considerations.
PET bottles generally provide a relatively smooth surface, but their curvature and flexibility can influence how labels are applied. HDPE bottles may require particular attention to adhesive compatibility because the material has relatively low surface energy. Glass bottles are rigid and dimensionally stable, although their surface condition and exposure to moisture still affect adhesion.
The label's face material also matters. Paper labels can provide a traditional appearance, but some constructions may absorb moisture, wrinkle, or lose dimensional stability in wet environments. Synthetic films, including suitable polypropylene or polyester materials, may offer better moisture resistance, depending on their construction.
Choosing a waterproof face material alone does not guarantee good performance. The adhesive must still form a reliable bond with the bottle, and the label must remain stable throughout the intended storage period.
Before purchasing labels in bulk, dairy manufacturers should test the proposed material on the actual bottle type. A label that works well on a rigid glass bottle may behave differently on a flexible plastic container.
This compatibility testing is particularly important when configuring milk bottle labeling equipment for multiple bottle materials or product formats.
4. Apply Labels Only When the Bottle Surface Is Clean
Residue can weaken label adhesion even when a bottle appears visually clean. Dust, oil, cleaning agents, fingerprints, and packaging residues may interfere with direct contact between the adhesive and the bottle surface.
In dairy production, the filling and handling stages should be reviewed if bottles repeatedly show inconsistent adhesion. Splashing, product residue around the neck, or contact with conveyor components may contaminate the intended label area.
Bottle cleaning procedures should be designed around the packaging process and the material being handled. If bottles are washed or rinsed, the line must provide enough time and suitable conditions for the labeling area to become dry before application, unless a wet-surface labeling system is specifically designed for that condition.
Cleaning agents must also be properly managed. Residual detergent or other chemicals can affect adhesive performance, so cleaning procedures should include appropriate rinsing and verification where necessary.
A useful troubleshooting method is to compare adhesion on freshly cleaned, dry bottles with adhesion on bottles taken directly from the production line. If the results differ, investigate the cleaning, drying, and handling stages before changing the labeling machine.
Maintaining a consistent bottle surface helps automatic milk bottle labeling machines deliver more repeatable results across production batches.
5. Set the Correct Labeling Pressure
After the label reaches the bottle, sufficient contact pressure is necessary to help the adhesive bond with the surface. If the pressure is too low, small gaps may remain between the adhesive and the bottle. These gaps can become starting points for edge lifting, particularly when the bottle is exposed to moisture.
However, increasing pressure without considering the bottle design is not always the right solution. Excessive pressure may deform lightweight plastic bottles, disturb their movement, or create other handling problems.
The required pressure depends on several factors:
-
Bottle diameter and curvature.
-
Label material and adhesive characteristics.
-
Labeling method and contact area.
-
Bottle rigidity and stability.
-
Production speed.
On round bottles, the label needs to conform to the cylindrical surface without trapping air or developing wrinkles. Wipe-down rollers, wraparound belts, or other application components should guide the label smoothly onto the bottle.
If a label is firmly attached at the center but begins lifting along one edge, the problem may involve uneven contact pressure, label tension, bottle positioning, or adhesive compatibility. Simply increasing the pressure may not correct the underlying cause.
When adjusting a milk bottle labeling machine, operators should change one parameter at a time and inspect the resulting labels. This makes it easier to identify which adjustment improves adhesion without introducing new defects.
6. Maintain Accurate Bottle Positioning and Label Alignment
Bottle movement during labeling can affect both label placement and adhesion. If a bottle slips, tilts, or rotates inconsistently, the label may contact the surface at an incorrect angle. This can create wrinkles, uneven overlap, or poorly bonded edges.
Stable bottle handling is especially important when working with lightweight plastic milk bottles. These containers may flex under pressure or move unpredictably if the conveyor guides are not properly adjusted.
The infeed system should provide consistent spacing, while guide rails and bottle-positioning components should keep each container aligned with the application station. Sensors can help detect bottle presence and coordinate label feeding, reducing errors caused by irregular product flow.
For wraparound labeling, the bottle's rotation and the label feed must remain synchronized. If the label advances too early or too late, the leading edge may land in the wrong position. This can affect the overlap area and create a weak point where the label may later lift.
A well-configured automatic milk bottle labeling machine should therefore be evaluated for more than its nominal output speed. Bottle stability, label placement accuracy, and consistent contact with the container are equally important.
7. Control Label Tension and Feed Accuracy
Label tension affects how the label moves from the roll to the bottle. If tension is too high, the label may stretch, distort, or fail to conform properly to the bottle surface. If tension is too low, the label may feed inconsistently, causing wrinkles or inaccurate placement.
These issues can become more noticeable at higher production speeds, when the labeling system has less time to compensate for irregular feeding.
Operators should check the unwind mechanism, tension control, label sensor, feed rollers, and label backing path. Worn rollers or incorrect sensor positioning may contribute to inconsistent label delivery.
The label roll itself should also be suitable for the equipment. Incorrect roll winding, damaged label edges, or variations in liner quality can interrupt smooth feeding.
For manufacturers using high-speed milk bottle labeling machines, stable label feeding is essential for maintaining both positioning accuracy and adhesion quality. A label that reaches the bottle at the correct moment and angle is easier to apply evenly, reducing the chance of wrinkles and poorly bonded edges.
8. Consider the Time Between Labeling and Refrigeration
A label may require time to develop its intended bond with the bottle surface. This is sometimes called adhesive dwell time. The exact time varies according to the adhesive formulation, temperature, substrate, and application conditions.
If bottles enter a cold or humid environment immediately after labeling, the adhesive may not have enough time to establish the required bond. The label might look secure at the labeling station but begin lifting during transport or refrigeration.
Where possible, manufacturers should evaluate whether the packaging layout allows a suitable interval between labeling and exposure to demanding conditions. This does not mean every dairy line needs an additional holding stage. The appropriate approach depends on the adhesive specification and the conditions the label must withstand.
Testing should reproduce the actual production sequence as closely as possible. For example, if bottles are labeled immediately after filling and then moved into refrigerated storage, the trial should follow the same sequence rather than evaluating labels only at room temperature.
This is particularly important when assessing a new label material, changing bottle suppliers, or modifying the line speed of a milk bottle labeling machine.
9. Test Labels Under Real Refrigeration Conditions
A label that passes a quick visual inspection immediately after application may still fail after several hours or days in cold storage. For this reason, manufacturers should establish a testing procedure that reflects the product's expected distribution conditions.
A useful evaluation can include the following stages:
-
Apply labels to representative production bottles using the intended machine settings.
-
Inspect label position, wrinkles, trapped air, and edge contact immediately after application.
-
Place samples in the expected refrigerated environment.
-
Inspect the bottles at defined intervals for edge lifting, bubbling, wrinkling, or loss of adhesion.
-
If relevant, expose additional samples to condensation and temperature changes representative of normal distribution.
-
Record the results for each label material, adhesive, bottle type, and machine setting.
Testing should include bottles from different production batches when variations in bottle dimensions or surface condition are possible.
Manufacturers should also define clear acceptance criteria. These may cover maximum allowable label displacement, visible edge lifting, barcode readability, and resistance to expected handling conditions.
A consistent testing process helps identify whether the problem originates from the label construction, bottle surface, environmental conditions, or machine setup. It also provides a more reliable basis for selecting a milk bottle labeling machine for refrigerated dairy packaging.
10. Optimize the Label Design for Cold Storage
Label design can influence adhesion just as much as the adhesive itself. A label that is too large, too stiff, or poorly proportioned for a bottle may resist the bottle's curvature and place additional stress on its edges.
For cylindrical milk bottles, the label dimensions should match the available labeling area. Excessive label length can create an unsuitable overlap, while an incorrect height may cause the label to extend into curved shoulder or base areas where contact is more difficult to maintain.
The label material should also have suitable flexibility for the bottle geometry. If a bottle has a tapered body or pronounced curves, the label may need a different shape or construction from one used on a straight-sided container.
Edge lifting deserves particular attention because the label's edges are often the first areas to separate from the surface. A suitable adhesive, accurate placement, and appropriate label dimensions work together to minimize this risk.
When evaluating a custom milk bottle labeling machine, manufacturers should provide sample bottles and production labels so that the complete application can be tested. This allows the equipment supplier to assess whether changes to label dimensions, positioning, or application components are needed.
Final Thoughts
Keeping labels securely attached to refrigerated milk bottles depends on choosing compatible label materials, controlling surface moisture, and maintaining consistent application conditions. By testing labels under actual refrigeration conditions and optimizing the settings of automatic milk bottle labeling machines, dairy producers can reduce edge lifting, improve packaging consistency, and minimize labeling waste.
For manufacturers seeking reliable labeling solutions, Beilt offers an option to explore equipment configurations based on bottle dimensions, label specifications, and production requirements. Selecting the right milk bottle labeling machine helps dairy businesses maintain accurate label placement and dependable packaging performance, even when products must withstand refrigerated storage and distribution.
www.beiltpack.com
beiltpack




Average Rating